


Expense Reports Guide
Expense reports help businesses easily track, approve, and reimburse employee expenses. This guide walks you through creating expenses, managing reports, and ensuring accurate reimbursement.
Expense Types
- Reimbursable - Expenses that will be paid back to the employee.
- Non-reimbursable - Company-paid expenses that need to be tracked.
- Billable - Expenses that can be charged to a client.
Create Expenses
SmartScan a Receipt
Expensify’s SmartScan automatically extracts receipt details, including merchant, date, total, and currency.
On the Web:
- Click the Expenses tab.
- Click the + icon in the top right and select Scan Receipt.
- Upload a saved receipt image.
Mobile App:
- Open the Expensify app and tap the camera icon.
- Upload or take a photo of your receipt:
- To upload, tap the photo icon.
- To take a photo, tap the camera icon. Ensure details are clearly visible.
- Normal Mode: Upload one receipt.
- Rapid Fire Mode: Upload multiple receipts.
Additional Options
- Manually fill in receipt details: Open the receipt and click Fill out details myself to edit merchant, date, total, category, attendees, and more.
- iPhone Shortcut: Hard press the Expensify app icon to quickly open SmartScan.
- Email Receipts: Forward receipts to receipts@expensify.com from an email linked to your Expensify account.
- For copilots: To send receipts to another user’s account, email receipts@expensify.com with their email in the subject line.
Per Diem Expenses
A per diem is a fixed daily allowance for business travel expenses:
- Click the Expenses tab.
- Click New Expense > Per Diem.
- Select your travel destination.
- Choose the start date, end date, start time, and end time.
- Select a sub-rate (if applicable). Include meal deductions or lodging costs if allowed.
- Fill in the required fields (e.g., category, description) and click Save.
Requirements: A Workspace Admin must enable per diem expenses and set per diem rates.
Mileage Expenses
Track mileage-related expenses by logging trips in Expensify:
- Manual Entry: Enter mileage manually.
- Map-Based Entry: Enter start and end locations to calculate distance.
On Mobile:
- Manual Entry: Enter mileage and rate.
- Odometer: Enter before and after readings.
- GPS Tracking: (Currently under development)
On the Web:
- Click the Expenses tab.
- Click New Expense.
- Choose the expense type:
- Manual Entry: Enter miles, select rate, and add optional details.
- Map-Based: Enter start and end locations, then click Save.
- Odometer: Enter start and end readings, select rate, and click Save.
Group Expenses
Use Attendee Tracking to document shared expenses:
- Click the Expenses tab.
- Select an expense.
- Click the Attendees field and enter a name or email.
- Click Save.
Attendees will not be notified or charged. The cost of the expense is evenly divided across all attendees.
Upload Multiple Receipts
On the Web:
- Click Expenses.
- Drag and drop up to 10 receipt images.
On Mobile:
- Tap the camera icon.
- Enable Rapid Fire Mode.
- Capture multiple receipts.
- Tap X to close.
Manually Add Multiple Expenses (web-only)
- Click Expenses > New Expense > Create Multiple.
- Enter up to 10 expenses.
- Click Save.
Upload Transactions via CSV/XLS (web-only)
- Navigate to Settings > Account > Credit Card Import.
- Under Personal Cards, click Import Transactions from File.
- Upload a CSV, XLS, OFX, or QFX file.
Updating Expenses
Editing Restrictions:
- Submitted expenses: Only editable by an approver or admin.
- As an employee, if you need to update expenses on a submitted report, it must first be retracted.
- Approved expenses: Cannot be edited unless reopened.
- Company card expenses: Amount cannot be changed.
Edit an Expense
- Click Expenses.
- Select an expense.
- Click a field (e.g., category, description) to edit.
- Click Save.
Delete an Expense
- Click Expenses.
- Select an expense.
- Click Delete.
Split an Expense
Break down an expense into multiple categorized parts.
- Click Expenses.
- Select an expense.
- Click Split Expense.
- Adjust the split amounts.
- Click Save.
Splitting is permanent and cannot be undone.
Merge Expenses
Combine two expenses into one.
- Click Expenses.
- Select two expenses.
- Click Merge.
- Select details to keep.
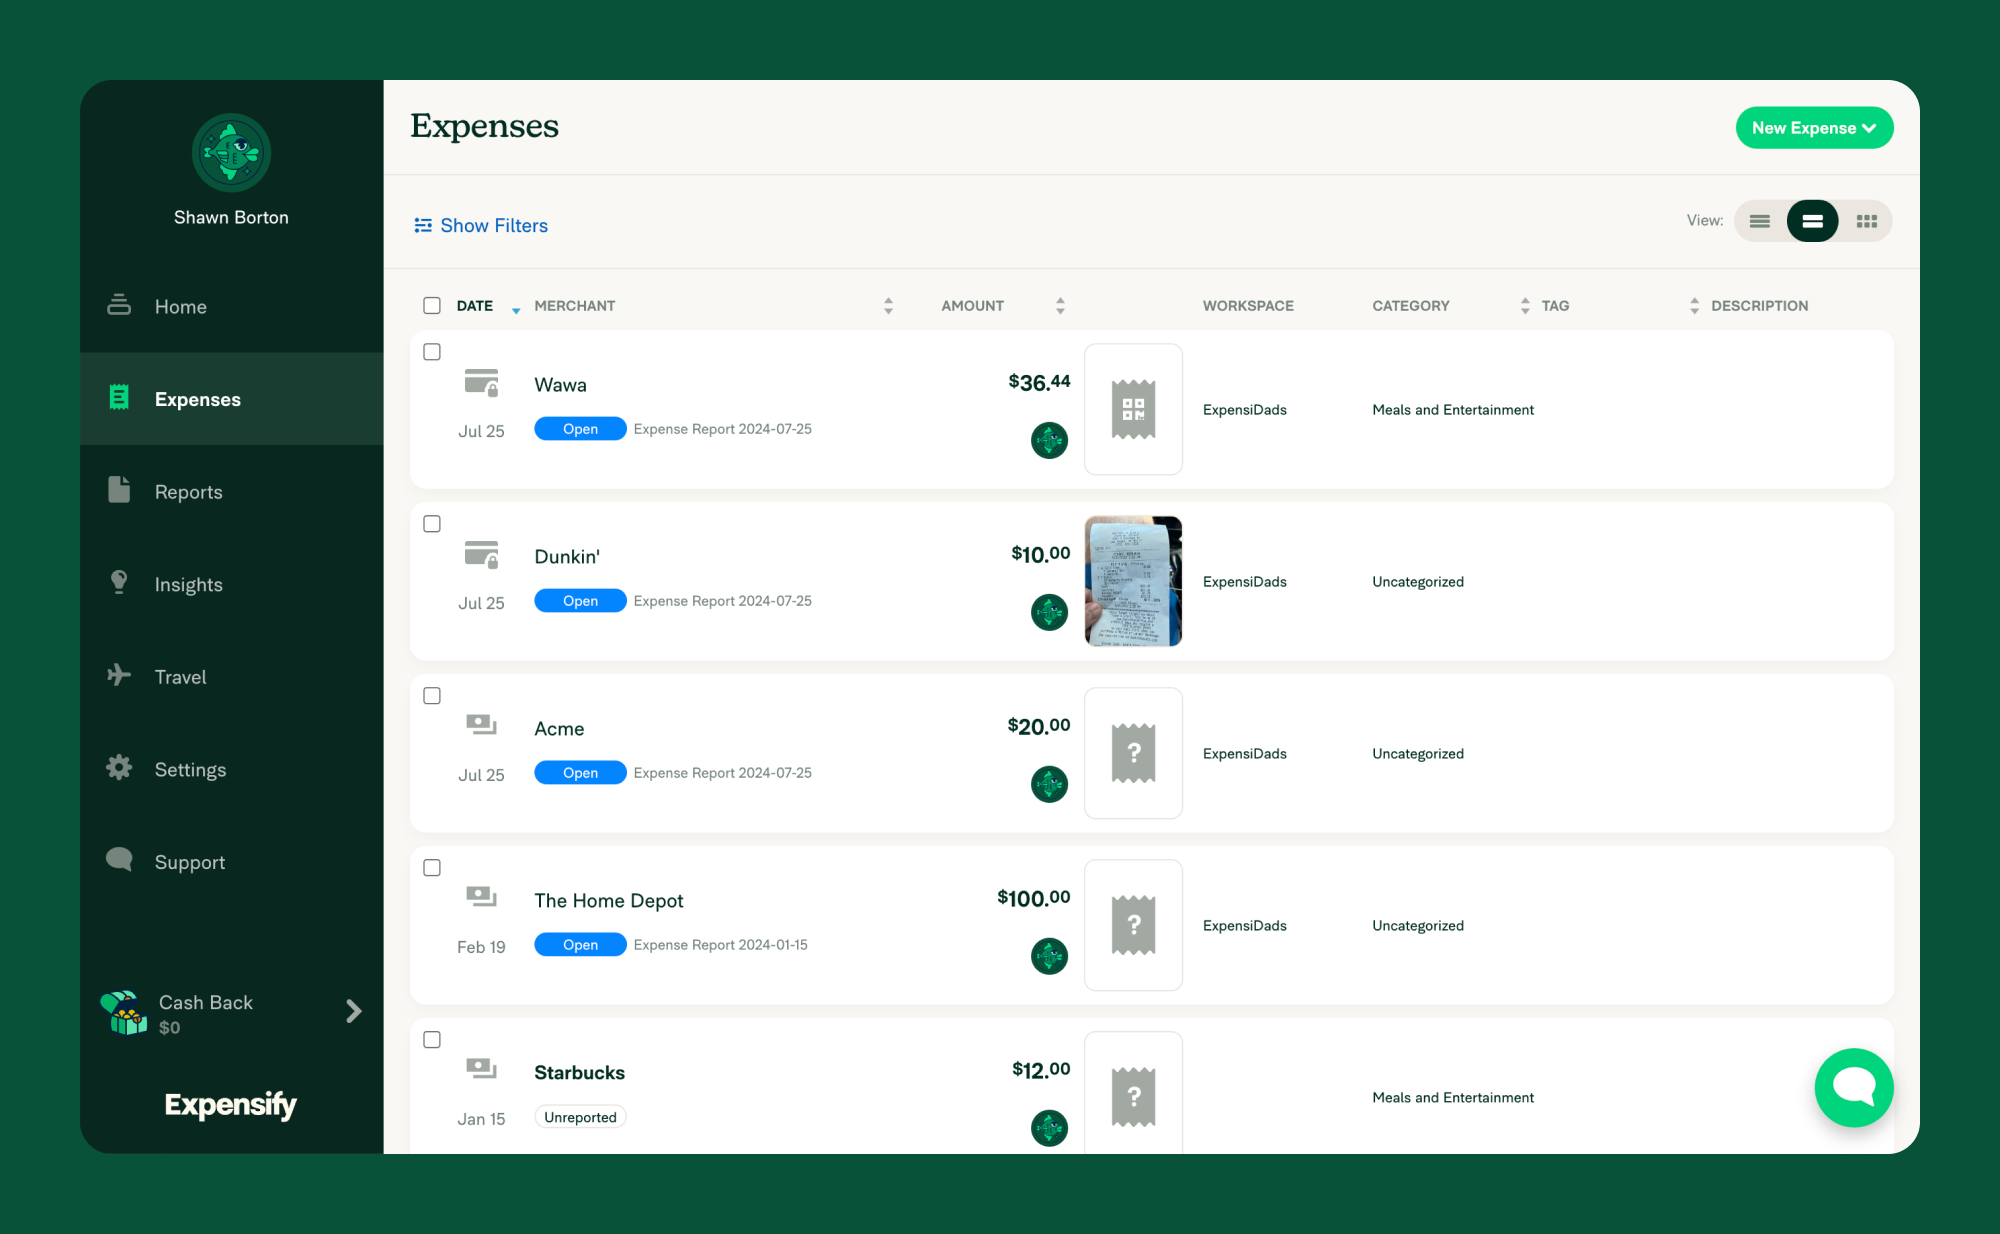
Expense Icons and Their Meanings
- 💵 Cash (banknotes) icon – Expense was added manually or by SmartScanning a receipt.
- 💳 Credit Card icon – Expense was imported from a connected personal credit card.
- 📄 Spreadsheet icon – Expense was imported via a personal CSV file.
- 🔒 Locked Credit Card icon – Expense was imported from a company card feed or via CSV upload.
Diagnosing Issues Using Receipt Images
If your credit card expenses are missing or incorrect, check for an attached receipt:
- SmartScanned receipts should be attached to most imported expenses.
- If your admin allows eReceipts (US only), low-value expenses may include an eReceipt instead of a traditional receipt.
- eReceipts will show the locked credit card icon along with a QR code for verification.
If an expected receipt is missing, try manually attaching it or checking with your admin for eReceipt settings.
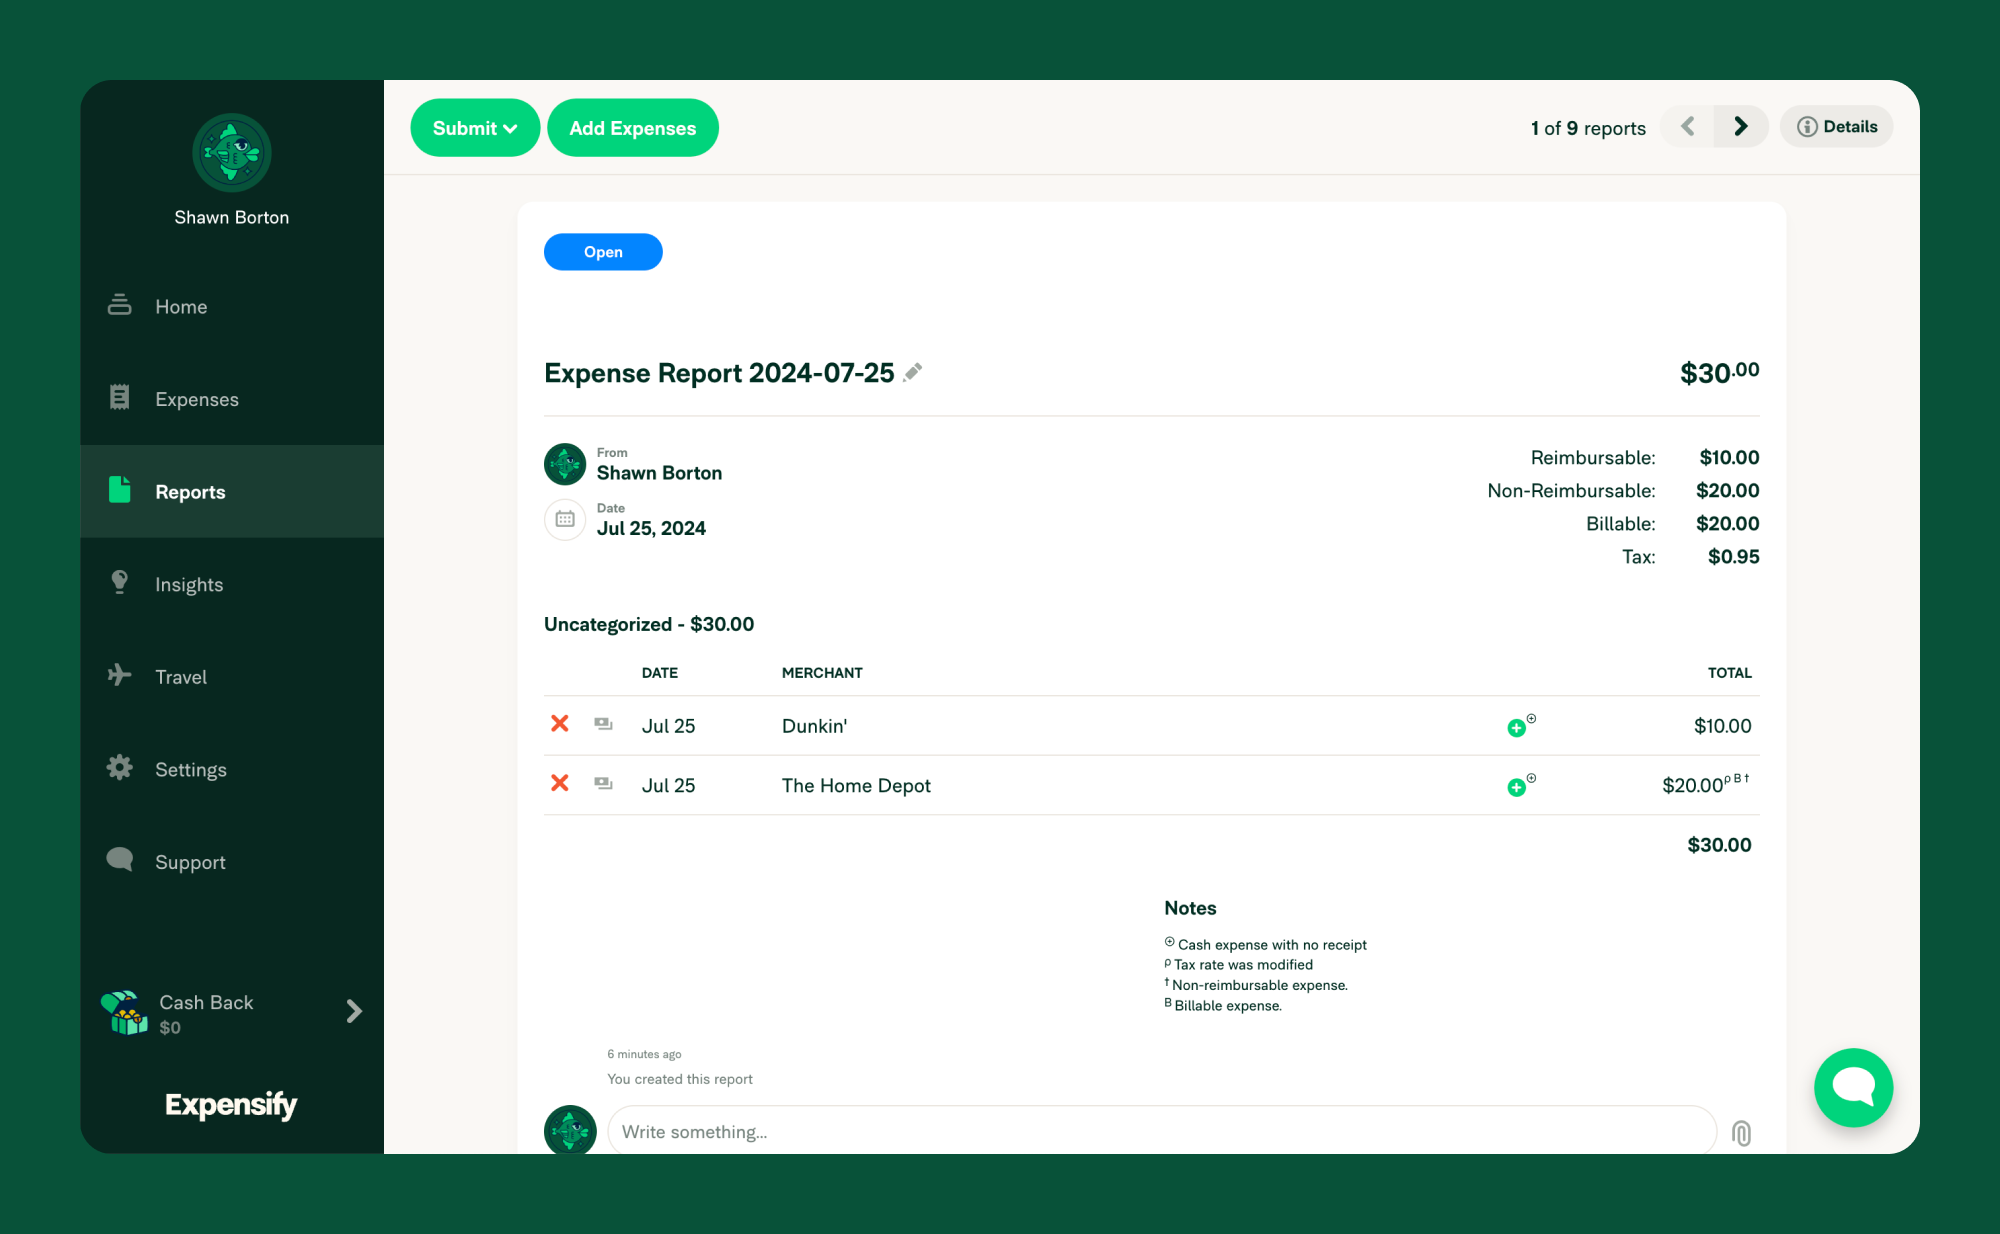
Add Expenses to a Report
Once you create expenses, they may be automatically added to an expense report if your company has automatic submission enabled. If not, you’ll need to manually add expenses to an expense report to submit them.
You can either create a new report or add expenses to an existing report. Some workspace settings may restrict your ability to create reports.
- Click the Expenses tab.
- Select expenses to add.
- Click Add to Report and choose:
- Auto-Report: Adds to an open report or creates a new one.
- New Report: Creates a new report.
- Existing Report: Adds to a selected report.
- None: Removes expenses from a report (if not yet submitted).
Add Expenses to an Existing Report
On the Web:
- Click Reports.
- Select the report.
- Click Add Expenses at the top of the report.
- Select the expenses to add to the report.
- If an expense you already added does not appear, use the filter on the left to search by the merchant name or change the date range.
- Note: Only expenses that are not already on a report will appear.
On Mobile:
- Tap the ☰ menu icon in the top left.
- Tap Reports.
- Select the report.
- Tap Add Expense, then tap an expense to add it to the report.
Move Expenses to Another Report
To move open expenses from one report to another:
- Select expenses:
- On the Expenses page, check the box next to each expense you want to move.
- Click Add to Report.
- Choose the destination report from the dropdown list.
- Only open expenses can be moved between reports.
- Submitted expenses in the Processing, Approved, Reimbursed, or Closed state cannot be moved.
Create a New Expense Report
On the Web:
- Click Reports.
- If a report has been automatically created for your most recently submitted expense, it will also be automatically submitted.
- If no report has been created, follow the steps below.
- Click New Report, or click the dropdown and select Expense Report (Other report types are explained in the FAQ).
- Click Add Expenses.
- Select expenses to add to the report.
- Only expenses that are not already on a report will appear.
- Click the X to close the pop-up when finished.
- (Optional) Make changes to the report and/or expenses:
- Click the Edit icon next to the report name to change it. (If this icon is not visible, the option has been disabled by your workspace.)
- Click the X next to an expense to remove it from the report.
- Click the Expense Details icon to review or edit details.
- Add comments at the bottom of the report for additional information.
- Click the Attachments icon to add attachments.
On Mobile:
- Tap the ☰ menu icon in the top left.
- Tap Reports.
- If a report has been automatically created for your most recently submitted expense, it will also be automatically submitted.
- If no report has been created, follow the steps below.
- Tap the + icon and select Expense Report.
- Tap Add Expenses, then select expenses to add to the report.
- Only expenses that are not already on a report will appear.
- (Optional) Make changes to the report and/or expenses:
- Tap the report name to change it.
- Tap an expense to review or edit details.
- Add comments at the bottom of the report for additional information.
- Tap the Attachments icon to add attachments.
Update the Expenses on an Expense Report
On the Web:
- Click the Reports tab and select the report.
- Click Details in the top right of the report.
- Click the pencil icon at the top of the menu.
- Hover over an expense and edit:
- A specific field by clicking the pencil icon next to it.
- Multiple fields by clicking the pencil icon to the left of the expense.
On Mobile:
- Tap the ☰ menu icon in the top left.
- Tap the Reports tab, then select the report.
- Tap an expense to open it.
- Tap any field on the expense to edit it.
Remove Expenses
On the Web:
- Click the Reports tab and select the report.
- Click the X icon next to the expense to remove it.
On Mobile:
- Tap the ☰ menu icon in the top left.
- Tap the Reports tab, then select the report.
- Hold the expense, then tap Delete.
Note: Removing an expense from a report does not permanently delete it.
FAQ
Why can’t I edit my expense amount?
- Company card expenses have fixed amounts from imported transactions.
- Approved expenses cannot be edited unless reopened.
Why don’t I see an expense type?
Your workspace settings may restrict available expense types.
Can I move expenses between reports?
- Yes, but only for expenses that are still open and not yet submitted.
How do I edit per diem expenses?
Per diem expenses cannot be edited. Delete and recreate the expense if needed.
Why didn’t my expenses merge automatically?
- Receipts were not SmartScanned.
- Dates or amounts differ.
- Expenses are in different user accounts.
- Expenses were already submitted or reimbursed.
Use manual merging for unmerged expenses.
Can Expensify automatically merge a cash expense with a credit card expense?
Yes, when a card expense is imported that matches the date and amount for a SmartScanned expense, Expensify automatically merges the new expense into the existing SmartScanned expense, and the expense will now show a credit card icon. The same is true if a receipt is SmartScanned and the transaction has already been imported—it will merge as soon as the SmartScan is complete.
When expenses merge automatically, Expensify uses the SmartScanned merchant name over the merchant data from the bank statement. If the SmartScan is stopped, Expensify can no longer guarantee that the data entry is accurate, so the expenses will not merge.
Note: Expenses created via the Expensify Expense Importer API will not automatically merge with card feed transactions.